Running Syncthing or Resilio on a Raspberry Pi 3
- 8 minsAs a pet project of mine, I have been using a spare Raspberry Pi 3 as a back up system for my files. I want to reduce my dependency on cloud services like Google Drive, Dropbox, etc and I want to have control over what I share.
I was looking for a P2P-based file storage software that could run over multiple OS. However I didn’t want to share my files with everyone but rather I was looking for a DHT overlay of my own devices.
I remembered Bittorrent Sync from few years back and found out two versions of it: Resilio and Syncthing.
Both allow you to back up files of your computer on any other device or share a large folder among friends or colleagues. If you have a NAS, you can also back it up there and sync the files between your computer and NAS. Finally, they also provide encryption, which is handy in the corporate environment.
1. Installing Raspbian on Raspberry 3
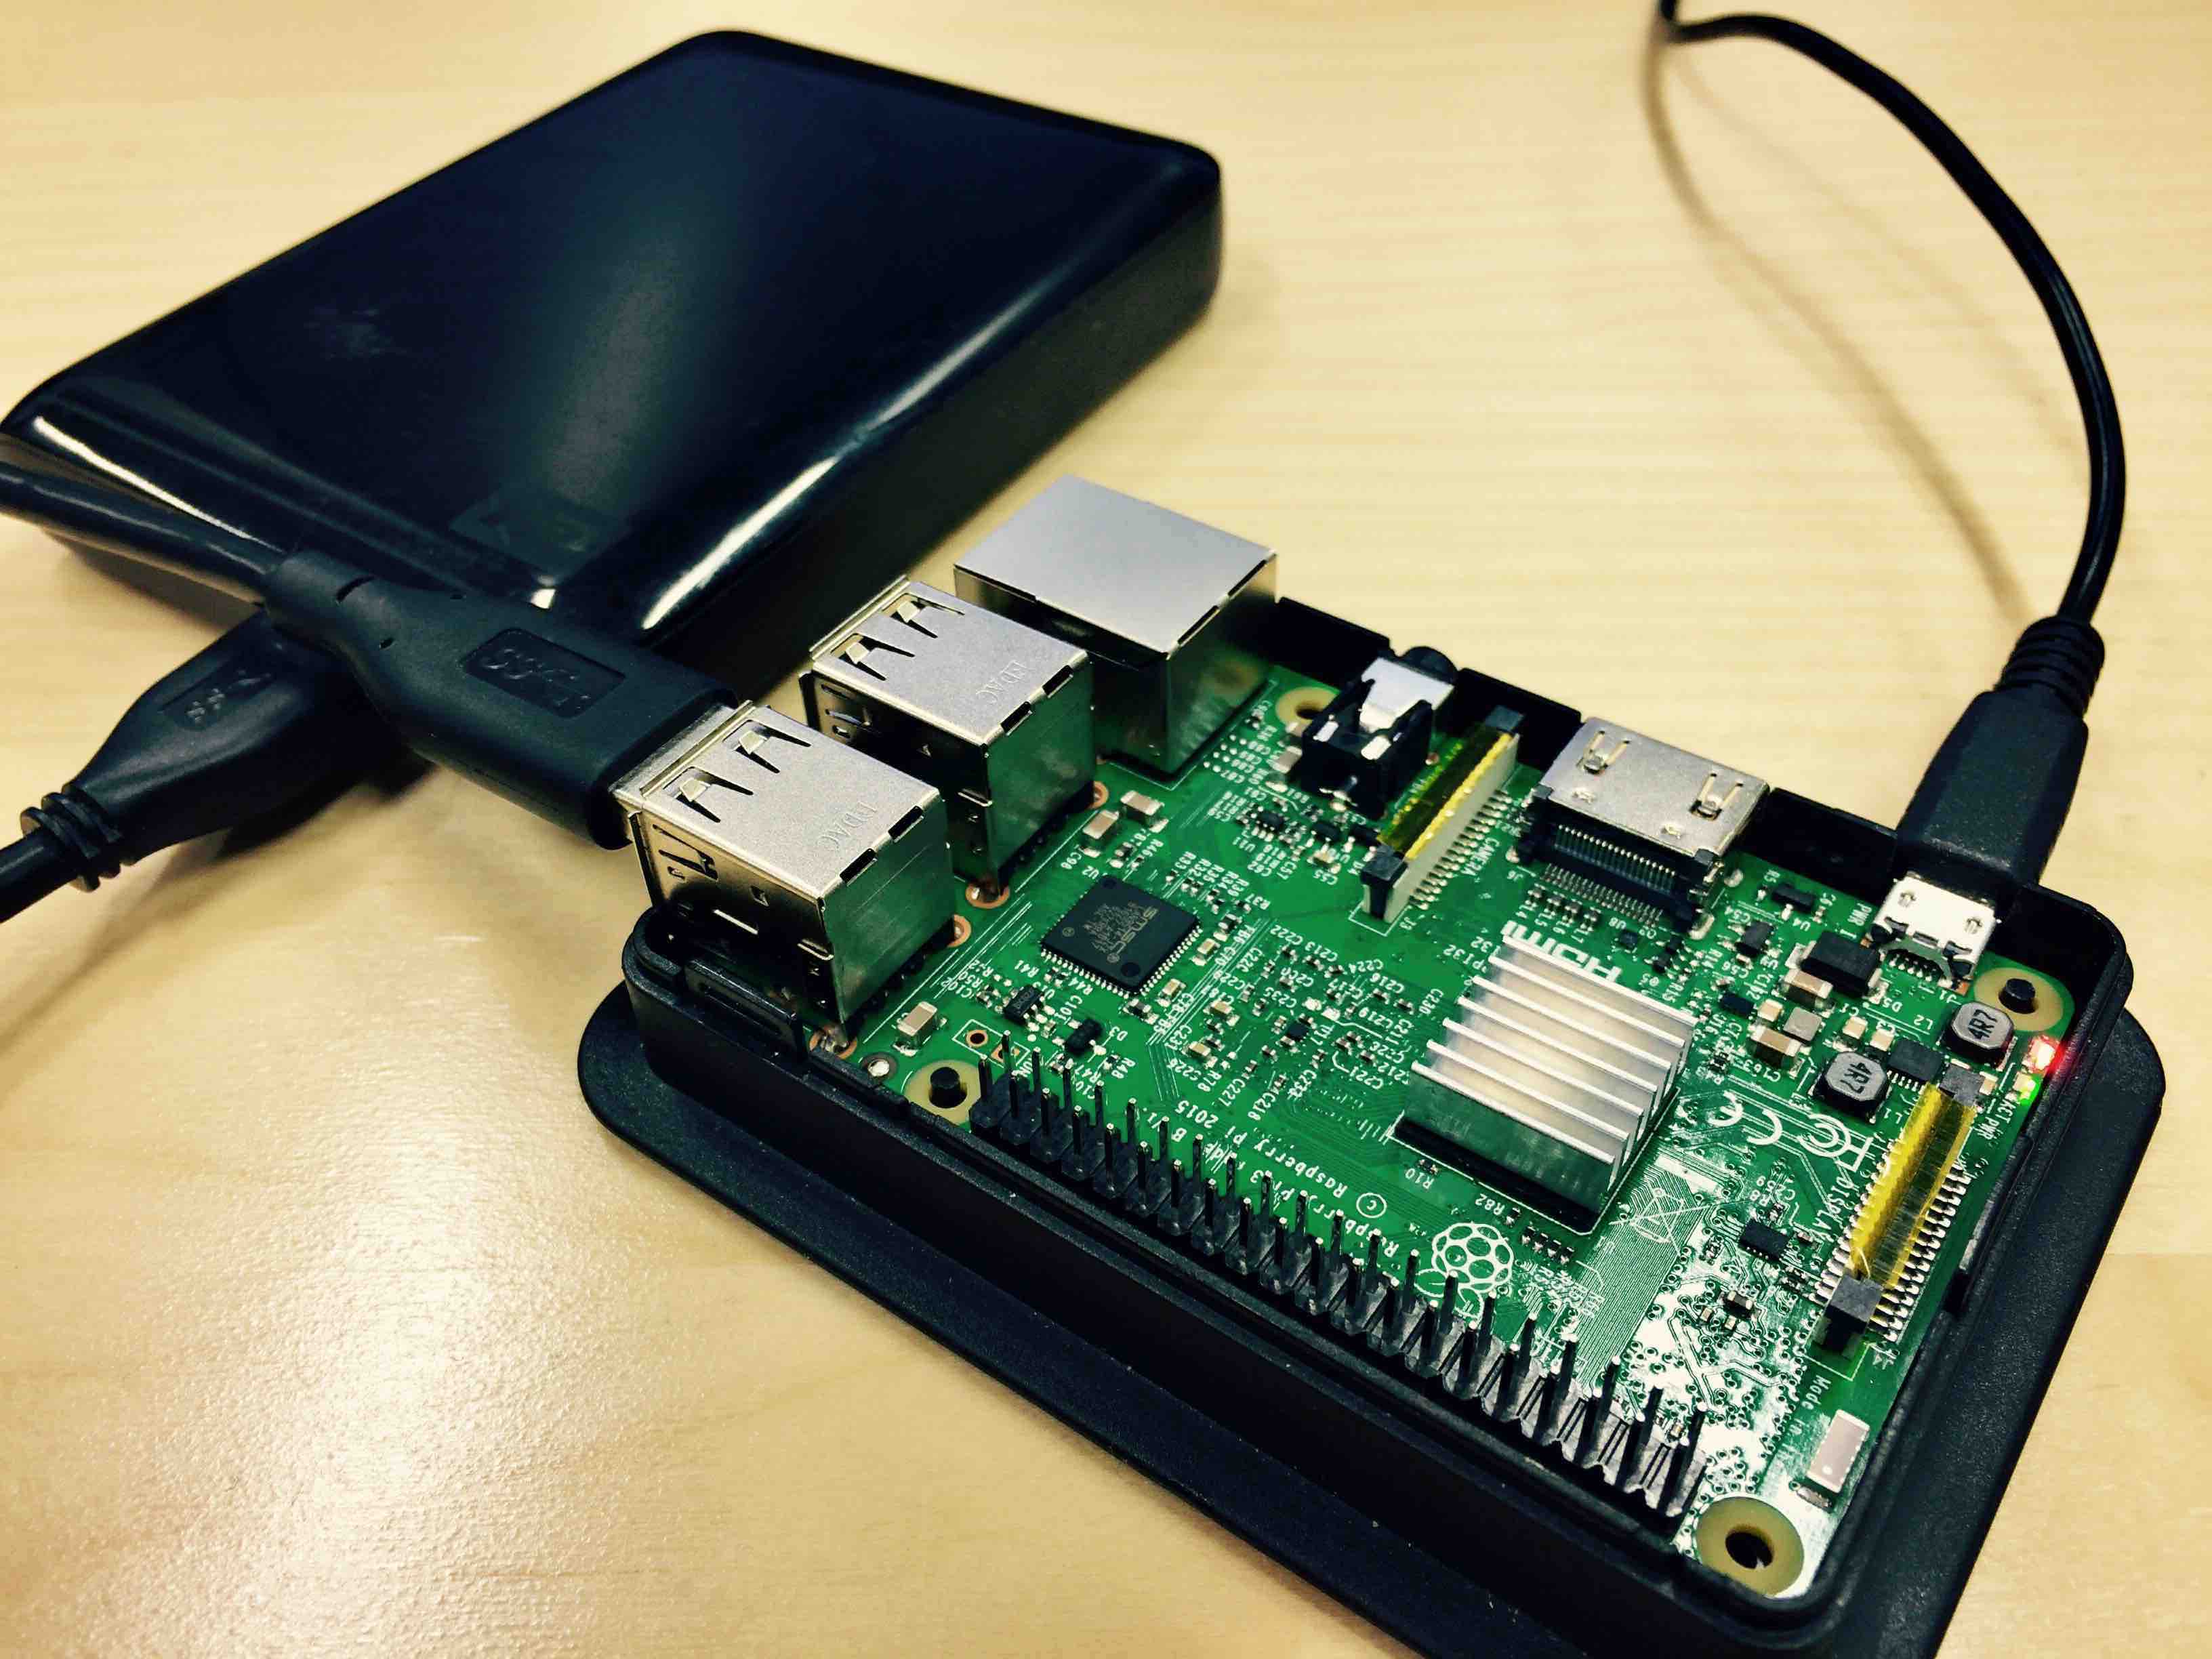
First step is getting a Raspberry 3 (I had a spare one at the office) and perhaps an external hard drive, although an SD card might be sufficient for you. Mine came with 16GB and would have been enough.
Raspberry 3 comes with a handy New Out Of the Box Software NOOBS which, despite the name, even more experience users use to install Raspberry’s OS.
This time I chose Raspbian as it is the default distro and possibly has more support.
2 Installing Syncthing OR Resilio
Update (15-02-2017): Switching to Syncthing
After using Resilio for about a month I have found it to be a bit unreliable and buggy on the Raspberry. For that reason I am currently using and recommend using Syncthing instead, which is an open-source alternative to Resilio. I will explain below the installation of both since some of you are directed here when looking for Resilio’s installation too.
In general, Syncthing strengths are the lower footprint both in CPU and memory, the fact that is Open Source and thus can more easily be debugged and scrutinized, and the fact that it has been consistently stable. In the case of Resilio its biggest strength was the iOS app for synchronizing pictures, but that didn’t make up for the fact that it is a proprietary software (thus little better than alternative cloud services) and, even more important, quite unstable and resource hungry on the Raspberry Pi.
2.1 Installing Syncthing on Raspbian
Installation is pretty straightforward from their apt packages.
# Add the release PGP keys:
curl -s https://syncthing.net/release-key.txt | sudo apt-key add -

# Add the "stable" channel to your APT sources:
echo "deb https://apt.syncthing.net/ syncthing stable" | sudo tee /etc/apt/sources.list.d/syncthing.list

# Update and install syncthing:
sudo apt-get update
sudo apt-get install syncthing
You will get an error on the Raspberry, asking you to install the apt-transport-https package, go ahead and do so:
sudo apt-get install apt-transport-https
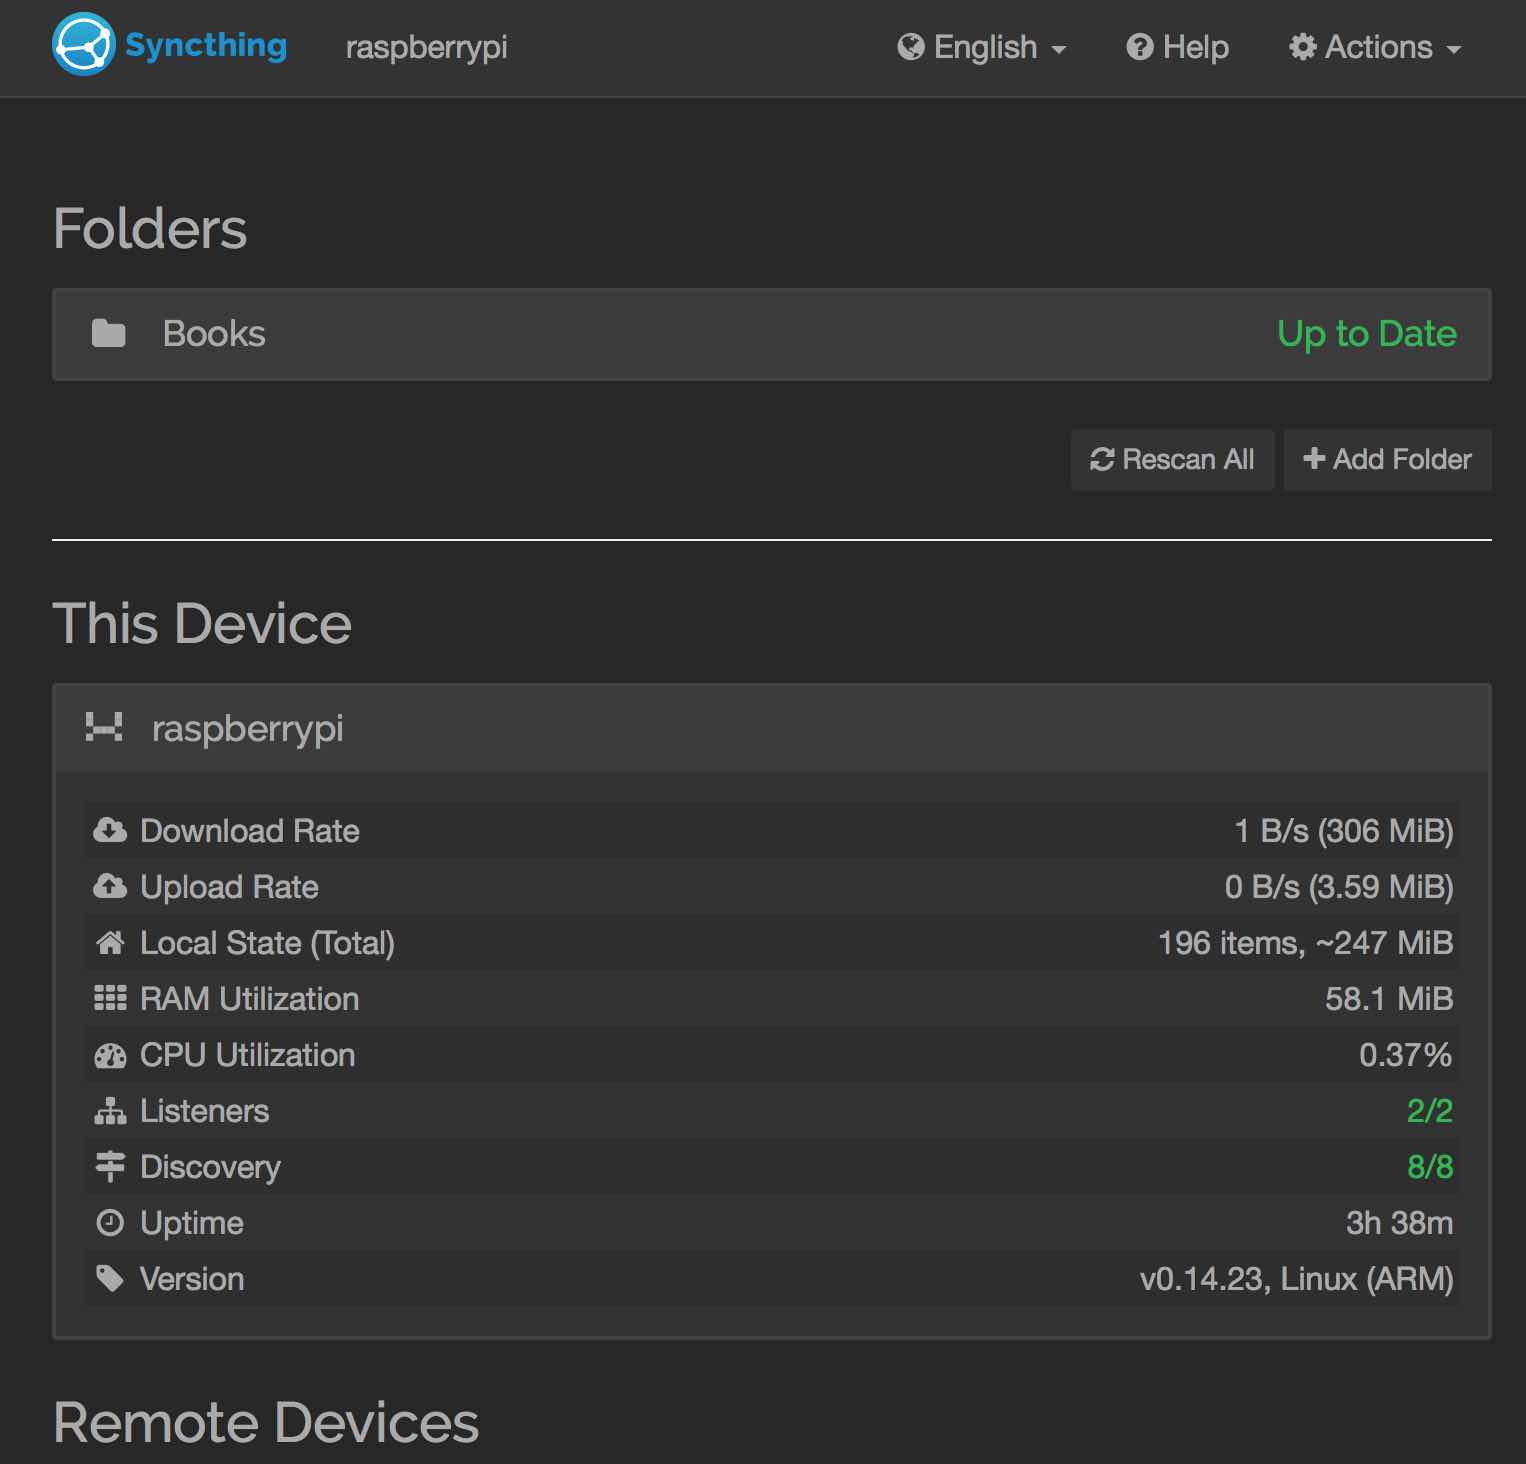
After this you should be able to access Syncthing’s GUI at localhost:8888, it’d look like below.
2.2 Installing Resilio on Raspbian
Also Resilio can directly be installed from their official Debian package repository.
Once installed we need to create the configuration file with its basic information.
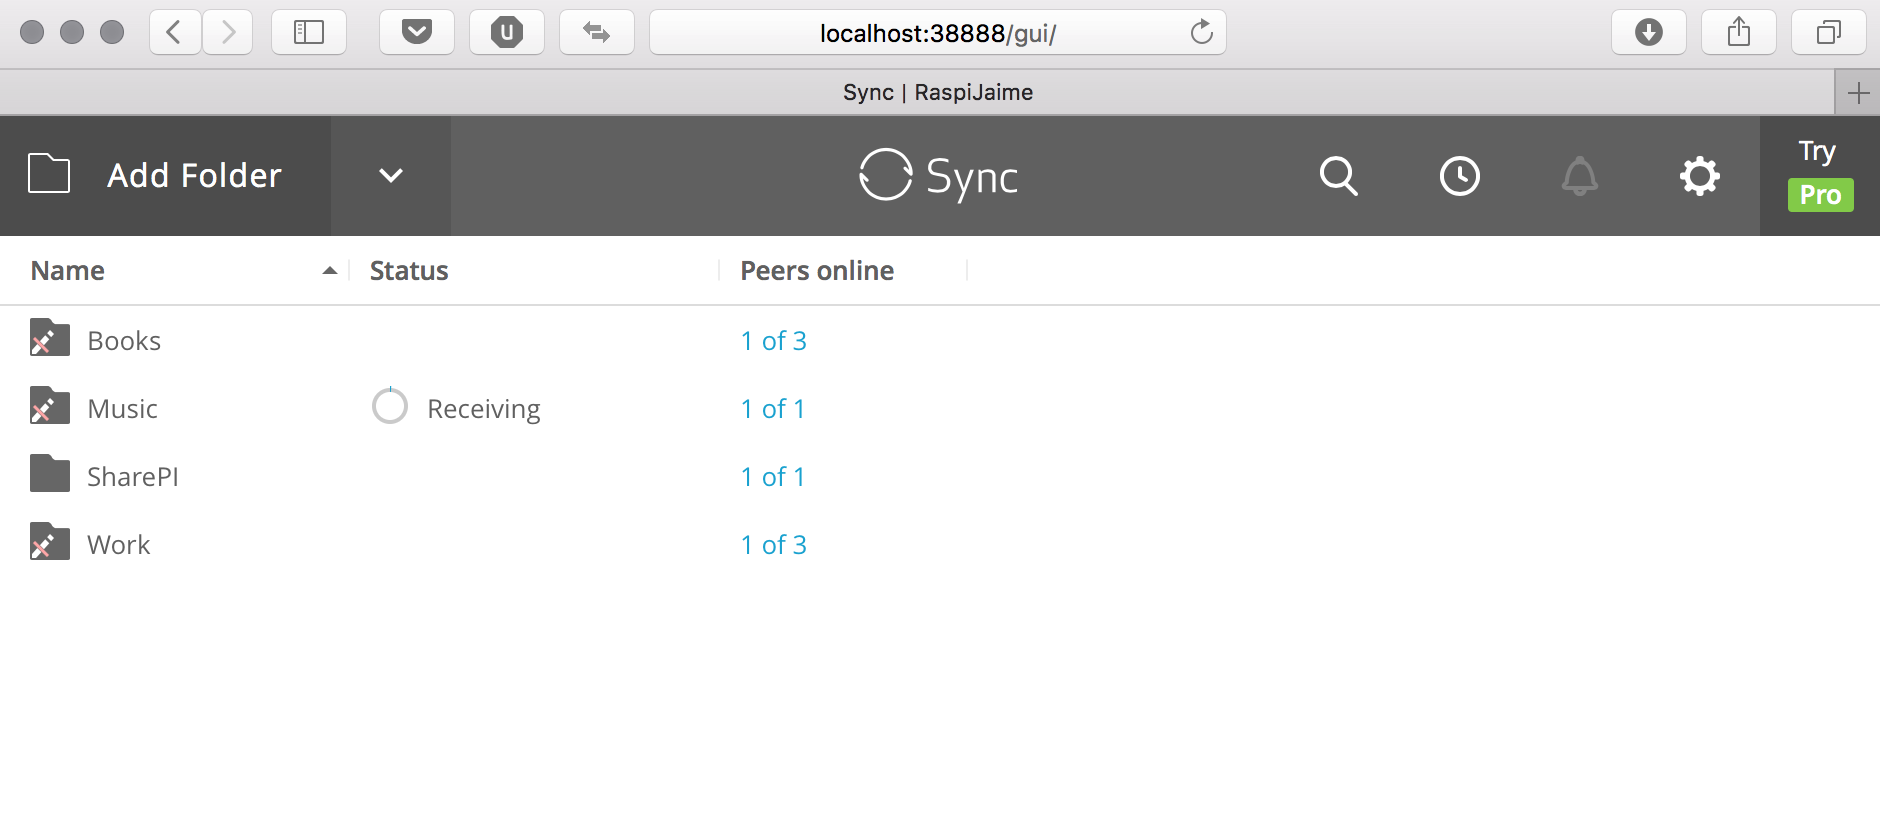
After this you can reboot the Raspberry, after reboot you should be able to access Resilio’s GUI at 0.0.0.0:8888, it’d look like below.
Now is it a good time to verify that you have networking, NATing and firewalls properly configured in your network.
raspi:~$  netstat -na | grep 8888
tcp        0      0 0.0.0.0:8888            0.0.0.0:*               LISTEN
You can also enable SSH to the Raspberry for remote access.
raspi:~$ sudo raspi-config
3. Mounting an External USB Hard Drive for storage
This point is only needed if you are planning to back up larger files.
First you’d need to format the drive into the ExFAT format. I chose ExFAT because I have Windows, Linux, Android and MacOS and ExFAT seems to me like the only native option on all of them (apart from the outdated FAT32).
Then we will need to install the drivers for the filesystem
raspi:~$ sudo apt-get install exfat-fuse
We can then reboot and check which are the available drives:
raspi:~$ sudo fdisk -l
You will most likely find the drive in the /dev/sda2 partition, being /dev/sda1 used for the partition table as below:
Disk /dev/sda: 931.5 GiB, 1000170586112 bytes, 1953458176 sectors
Units: sectors of 1 * 512 = 512 bytes
Sector size (logical/physical): 512 bytes / 512 bytes
I/O size (minimum/optimal): 512 bytes / 512 bytes
Disklabel type: gpt
Disk identifier: 9F4936FE-C906-DISK-DISK-D4A5BEF6F496

Device      Start        End    Sectors   Size Type
/dev/sda1      40     409639     409600   200M EFI System
/dev/sda2  411648 1953456127 1953044480 931.3G Microsoft basic data
You could test if it mounts with mount /dev/sda2 /mnt and dmesg to see the mounting process.
Assuming everything works OK and you can mount your device you probably want to mount it automatically every time it boots. I found a good reference at miqu blog for exactly that purpose. I copy it below for the sake of brevity.
First run sudo blkid , it will return a list of devices and their UUIDs. Note the one for your partition:
Now you can use sudo nano /ect/fstab to add your partition to automount. Assuming you are mounting MYUUID on MYHD I used the same defaults as the article suggests:
UUID=MYUUID /mnt/MYHD exfat defaults,auto,umask=000,users,rw 0 0
Now every time the Pi starts it knows how to mount your drive. Now that all is ready and running, you have yourself an excellent back up and file sharing system. Here is the final Set Up with Bad Piggy included.

Issue 1: Overheating
The Raspberry will tend to overheat during syncing, and that’s probably normal under high load (as it is when running a DHT). However it shouldn’t excess 75°C or performance will suffer. I believe at 85°C the Raspberry will shutdown to prevent damage.
I have noted Resilio to be more chatty than Syncthing and to consume resource more often. Syncthing behavior is that of going into low-power listening mode after the transaction is completed. Resilio on the other hand keeps processing for quite some time. I don’t know the reason for that.
It is then important to have good ventilation on your board and it wouldn’t hurt to stick a heat dissipator on top, like the one I show on the first picture.
Another thing you can do is disable the GUI with sudo raspi-config. With that the temperature should drop already by 10 degrees pretty fast.
To be sure of the current temperature run
raspi:~$  vcgencmd measure_temp
temp=54.8C
Issue 2: Connectivity
When I was running Resilio I noticed intermittent connectivity problems over wifi. I have not managed to debug where the problem originated. One candidate was that the Raspberry was running a DHCP client and changing addresses periodically, but after disabling that and setting a static address in the local network domain, the problem persisted. Another issue could have been the large amount of other WiFi Access Points, but I could not affect that. It could also be the fat that the Ethernet port Using the Ethernet port simultaneously, thus having two different IP addresses on two interfaces, showed that there were a relatively larger percentage of dropped packets over wifi. On top of this, there could be some other issues with Resilio itself.
eth0      Link encap:Ethernet  HWaddr <XXX>
          inet addr:<XXX>.221  Bcast:10.0.3.255  Mask:255.255.252.0
          RX packets:693059 errors:0 dropped:2 overruns:0 frame:0
          TX packets:349176 errors:0 dropped:0 overruns:0 carrier:0
          collisions:0 txqueuelen:1000
          RX bytes:978393262 (933.0 MiB)  TX bytes:31174959 (29.7 MiB)

wlan0     Link encap:Ethernet  HWaddr b8:27:eb:65:20:61
          inet addr:<XXX>.222  Bcast:<XXX>.255  Mask:255.255.252.0
          RX packets:207383 errors:0 dropped:3062 overruns:0 frame:0
          TX packets:62074 errors:0 dropped:0 overruns:0 carrier:0
          collisions:0 txqueuelen:1000
          RX bytes:253370999 (241.6 MiB)  TX bytes:8083493 (7.7 MiB)
I still have to figure out what was the reason since I just ended up disabling the wlan0 interface. If you want to continue the testing you can use some of the following commands, please let me know the results on the comment section of the blog.
iwlist Displays detailed information about wireless interfaces
raspi:~$ sudo iwlist wlan0 scanning
iwevent Shows events on wireless interfaces
pi@raspberrypi:~ $ sudo iwevent
Waiting for Wireless Events from interfaces...
iostat Provides CPU statistics and I/O data about devices and partitions
pi@raspberrypi:~ $ iostat
Linux 4.4.34-v7+ (raspberrypi) 	23/01/17 	_armv7l_	(4 CPU)
avg-cpu:  %user   %nice %system %iowait  %steal   %idle
           7.36    0.00    7.68    5.47    0.00   79.49
Device:            tps    kB_read/s    kB_wrtn/s    kB_read    kB_wrtn
mmcblk0           3.06        35.37       123.84     394890    1382484
sda              25.63        27.17      2896.17     303364   32332080